Sell Event Tickets with Easy Digital Downloads
Easy Digital Downloads is a great WordPress e-commerce plugin, which primarily is used to sell digital products. A quick look at the EDD showcase page shows dozens of examples of companies who use it to sell WordPress plugins and themes, music, and a variety of services. I didn’t see any sites that sell event tickets with Easy Digital Downloads though.
Using the guide below, you can easily sell tickets to any type of event like conferences, golf tournaments, banquets, classes, etc.
How to Sell Event Tickets with Easy Digital Downloads
For starters, let’s list out the plugins you’ll need:
- Easy Digital Downloads – to sell your event tickets.
- EDD Downloads as Services – to avoid having references to “downloads” on your confirmations.
- Conditional Checkout Fields for Easy Digital Downloads – to collect attendee specific information.
- Payment gateway plugin (optional) – if you need other payment gateway options like Stripe or Authorize.net.
With these plugins installed and activated, you’re on your way to be able to sell event tickets with Easy Digital Downloads.
For the remainder of this tutorial I’m going to assume you have some knowledge of how Easy Digital Downloads works. I won’t get into the specifics on how to do certain basic things like creating a new product. Where possible I’ll link to applicable help documentation.
Create Your Event
 First we need to create an event product in Easy Digital Downloads. This product should have all of the relevant information about your event such as price, date, time, location, etc.
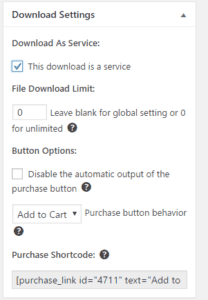
Under Download Settings you will want to check the this download is a service option.
This option removes the “no downloadable files” text on the purchase confirmation page so as to not confuse your customers.
Allow Item Quantities to be Changed
Most events will allow more than one person to register at a time. For example, a golf tournament may want to allow a customer to register a foursome all in one payment.
In Easy Digital Downloads, you can allow your customers to change the item quantities that they are purchasing. To do this, go to Downloads > Settings > Misc tab. Check the box next to Item Quantities and click Save Changes.
Setup the Conditional Checkout Field(s)
For any event you will likely need to know some information about your attendees. For example, you may need to know the names of each attendee, perhaps their t-shirt size, meal choice, or any number of other things.
With the Conditional Checkout Fields for EDD plugin, you can ask your customers specific questions that only pertain to a certain product.
For example, if you sell tickets to a banquet but also sell music downloads, you don’t want to ask all of your customers if they prefer to have the fish or the steak with their dinner. Only the customers who are purchasing a ticket to your event should be asked to complete information that is specific to the event.
On the Conditional Fields settings page, there are a few options that will help manage your event ticket sales:
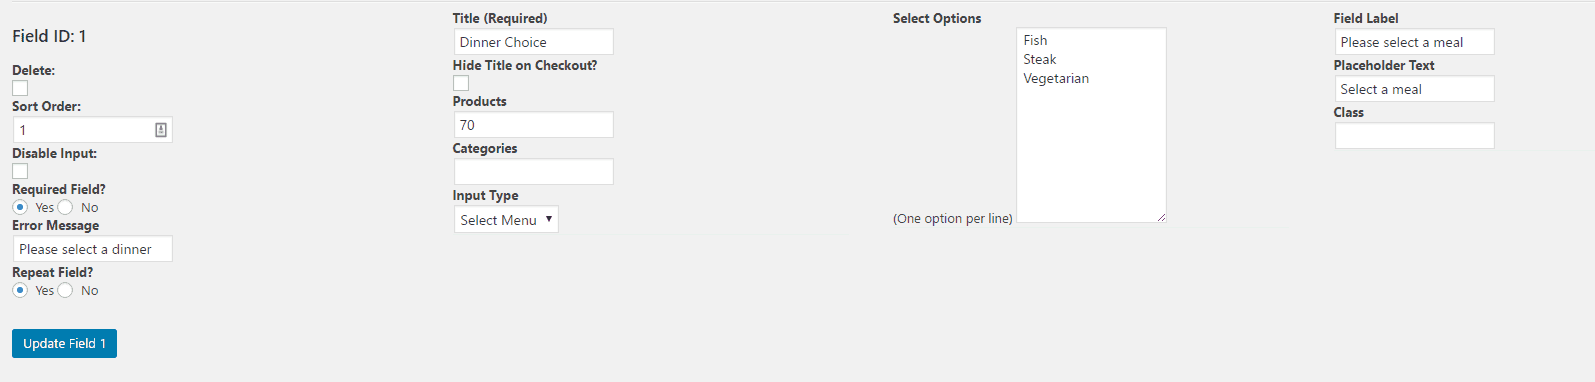
- Required Field: If you absolutely must receive the information you are asking for from each customer, check Yes next to Required Field.
- Also, enter useful information in the Error Message field to help customers understand what went wrong if they don’t fill out all of the required fields.
- Repeat Field: This will cause your custom field to be repeated for each ticket in the customer’s cart. So if you are asking for meal choices and someone registers five people, they can select the meal choice for each of the attendees.
- Products: Here you will enter the product ID(s) of the event “product”. If you have multiple event products, you can enter each ID separated by a comma. You can find the product ID by visiting Downloads > All Downloads. Hover your mouse over the event and copy the ID number that shows up next to the edit links.
- Input Type: Decide what type of information you need to collect from your customers. Do you need them to select from a predefined list of items like a meal choice, or do you need them to have a text box to enter information like their name? There are a number of input field types to choose from.
- If you choose a Select Menu, Checkbox, or Radio Buttons, you will need to enter the options in the Select Options field.
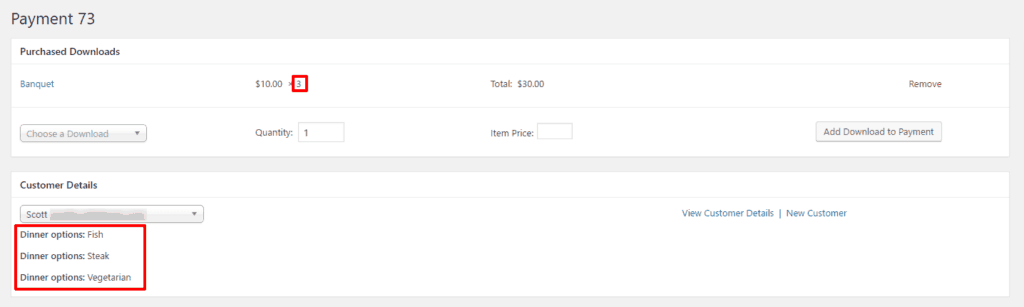
Now when your customer goes to checkout they will be able to complete the necessary fields to complete their registration.

Then after the customer submits their payment the information is recorded in the order’s payment history.