Save Custom Customer Inputs In WooCommerce
If your shop gets a lot of repeat business, your customers likely don’t want to fill in the same information over and over again at checkout. As a store owner, you don’t want them to have to fill in this information more than once either because it can hurt your conversion rate.
In Conditional Woo Checkout Fields, we’ve introduced a new feature that allows you to save a customer’s input for your conditional fields.
When a customer checks out on your site, they will enter in their responses to your conditional fields just like they always have. This information will then be saved to the customer’s account. Now the next time they check out on your site, those same fields will be automatically filled in for them on the checkout page.
The customer has the option to change their responses on subsequent purchases if needed. If they do, their new responses will override the previously saved input in their account. However, this will not affect previous orders.
Who Would Benefit From Saving Customer Input in WooCommerce?
Any shop that has repeat business from customers with accounts on the shop’s site will benefit from this feature. No customer wants to enter the same information more than once. That’s why WooCommerce saves billing and shipping information with the customer’s account, so enabling this feature is a really great way to keep your customers happy.
For example, let’s say you run a golf tournament every year and use Conditional Checkout Fields to collect golfer names at checkout.
In the first year, a customer will come to your site and pay for their foursome. At the checkout page, they might be prompted to enter the names of each of the four golfers (using Conditional Checkout Fields).
Next year, when the same customer returns to your site to pay for their foursome, they will arrive on the checkout page and see the four golfer name fields filled in with the names entered last year. Of course, they may not have the same golfers in their group this year, so they can change the names if they want to. But if any of those names are the same as the previous year, no additional entries will be necessary.
How do I Enable This in Conditional Checkout Fields?
This feature is available in versions 3.7 and up of Conditional Woo Checkout Fields. If you do not have this version, please update the plugin on your site to get this feature.
There are two ways of saving the customer’s input. 1) Save all entries for all fields, or 2) save all entries for individual fields.
Save all entries for all fields
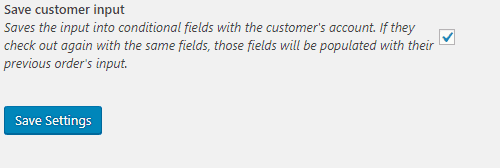
In the WooCommerce > Conditional Fields page, click on the Settings tab. Check the box next to Save Customer Input and save your settings. That’s it! The next time a customer checks out on your site, their input in your conditional fields will be saved to their account. Any future checkouts by that customer will be populated with their prior entry.

Save all entries for individual fields
In each field’s settings there is a check box that will enable you to save the customer’s input for that field. Only input into the fields that have this option enabled will be saved. However, if the save all entries for all fields option discussed above is enabled, the individual field setting will have no effect.

Where will the customer input be saved?
The customer’s input into your conditional fields will be saved with their order as it always has been. The difference is that it will now also be saved along with the customer’s account as well, the same way that WooCommerce saves the customer’s name, address, phone number, etc.
You can view the saved data by visiting the user’s profile in your site’s admin. Visit Users > All Users, then click on the user’s name. There will be a section titled “Conditional Woo Checkout Field Pro Saved Fields”, which will have all of the saved information. You will have the ability to change the information on behalf of the customer here. Changes made here will not affect any information saved with their previous orders.
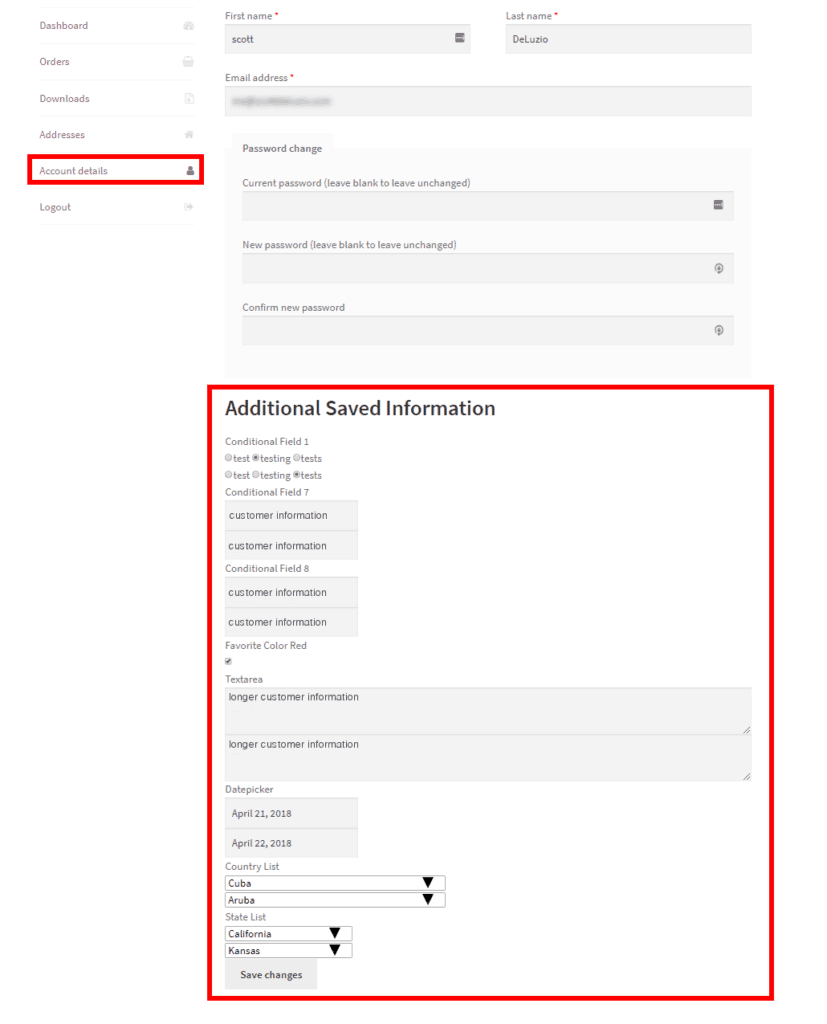
Customers will be able to view and edit the saved information in their account under the Account Details section.

